
Create a private, Sybil-resistant voting system where anyone can prove they’re eligible and vote exactly once without revealing who they are. You’ll use zero-knowledge proofs to keep votes unlinkable to identities, while keeping results publicly verifiable on-chain.
❓ Wondering how ZK voting works?
In traditional voting, a central authority verifies identities and counts the ballots. On-chain, we aim for decentralization, privacy, and verifiability, without exposing voters’ identities. There’s still a centralized authority that defines who can vote by adding addresses to the allowlist, but once registered, voters can cast their ballots privately.
Normally, on-chain voting makes every choice public. With ZK proofs, users can prove they’re on the voter list and haven’t voted yet, without revealing their address or how they voted. That is done by breaking the chain of ownership of two addresses.
- The contract owner maintains an allowlist and decides who are the voters
- Voters register themselves to a Merkle tree on-chain with a commitment
- They generate a ZK proof of membership using the commitment secret to prove they registered
- The proof is sent to a verifier contract to check validity. If it passes, the vote is accepted
- A nullifier ensures one-person-one-vote by preventing double voting, but without linking the vote to the registered voter address
🤔 Why ZK voting?
Traditional on-chain voting exposes every voter’s address and choice, which breaks privacy and can lead to coercion or retaliation. Off-chain voting hides identities but usually relies on centralized authorities that must be trusted to count votes correctly.
ZK voting combines the best of both worlds:
- Voters prove eligibility and uniqueness (one-person-one-vote)
- No one can see who they are or how they voted
- The process remains verifiable on-chain
- Ensures integrity + privacy for every voter
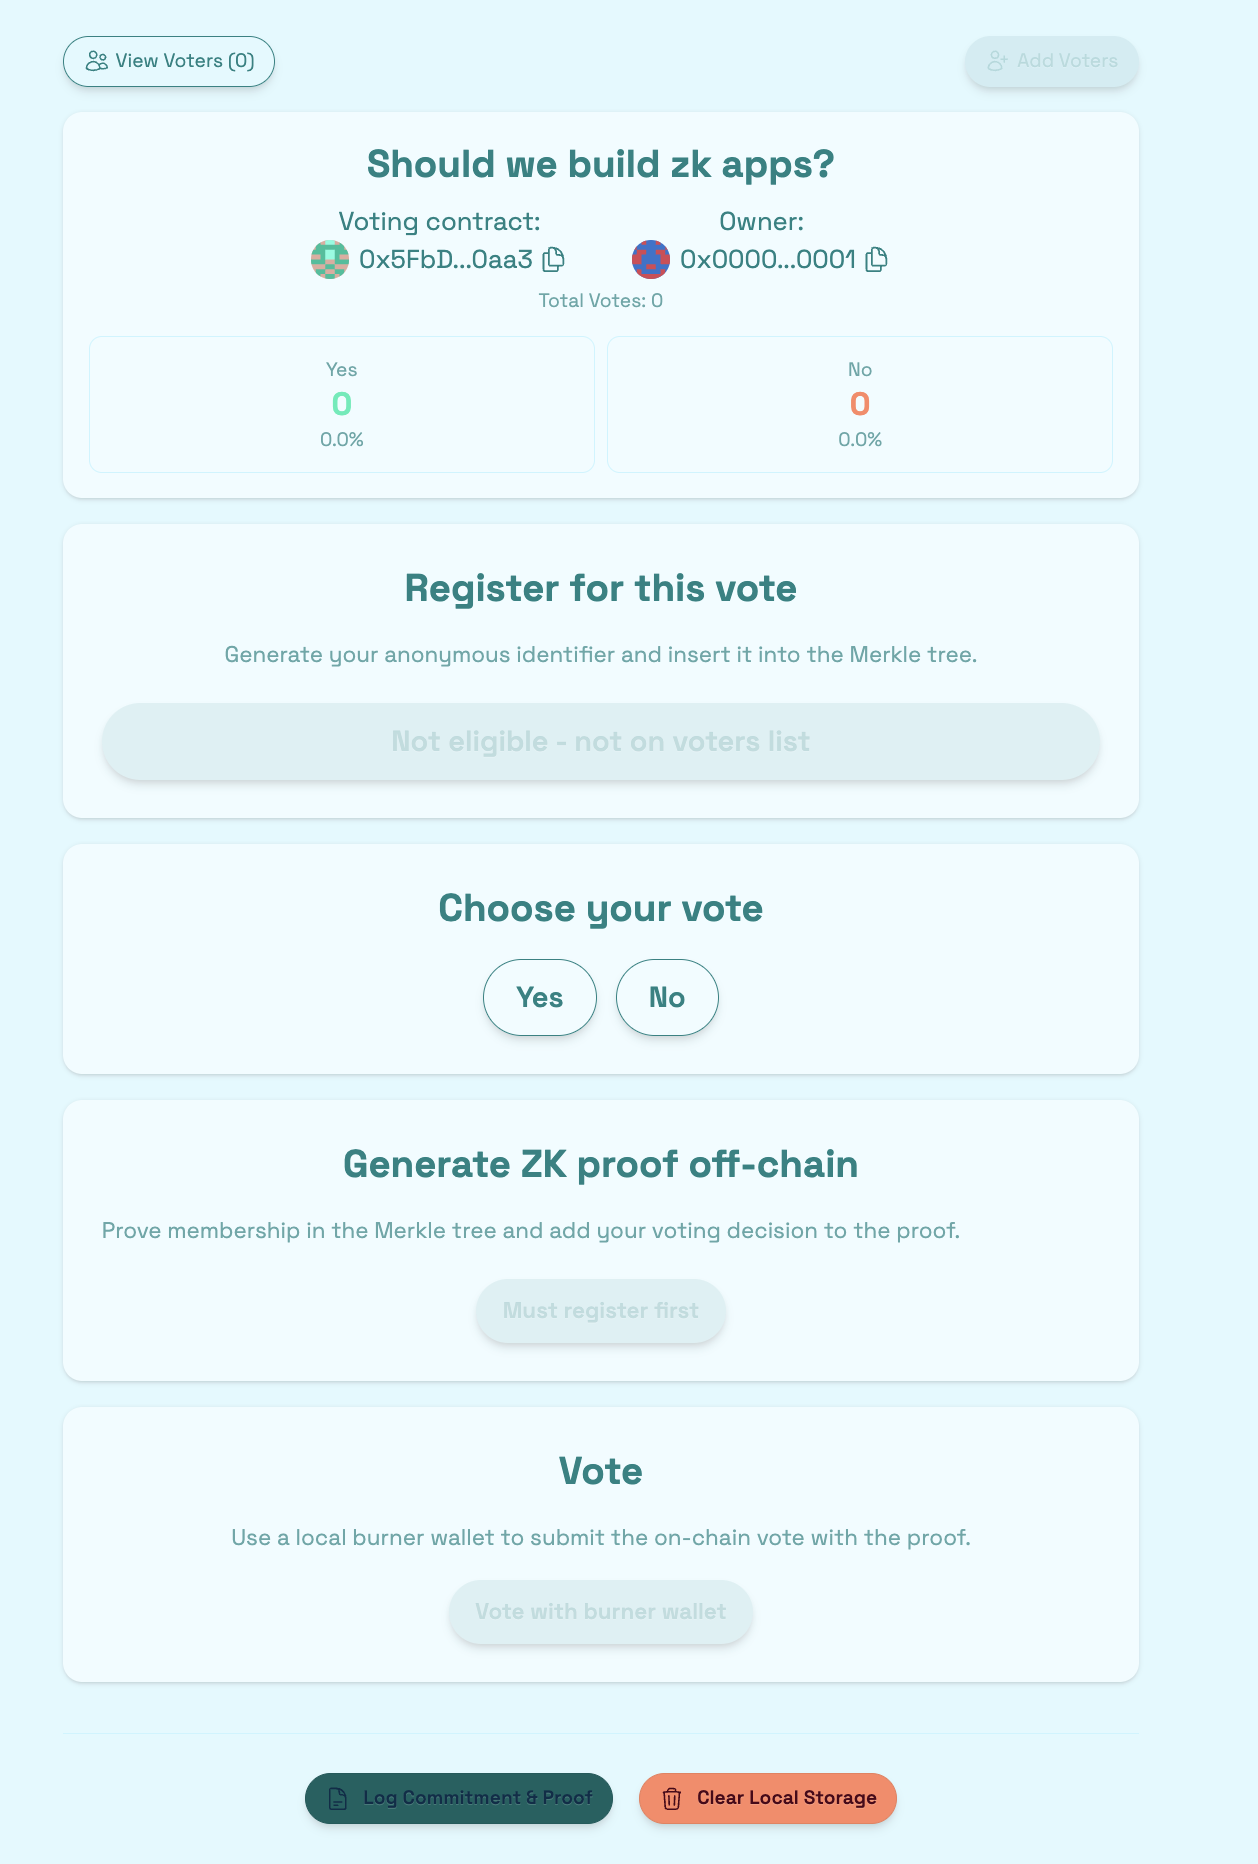
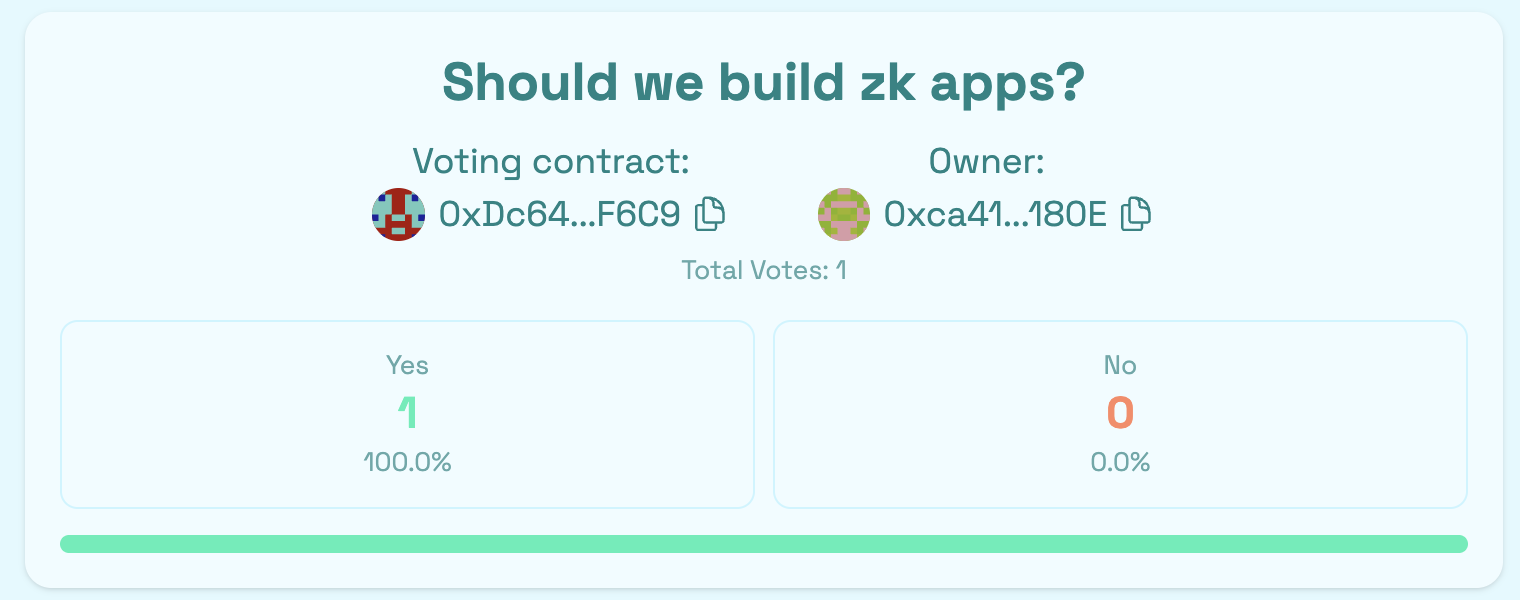
🌟 Final Deliverable An app where anyone can create a Yes/No question, and registered voters can cast their votes anonymously. Results remain fully transparent and visible live on-chain.
- Deploy your contracts to a testnet
- Build & upload your app to a public web server
- Submit the URL on SpeedRunEthereum.com! 🚀
💬 Meet other builders working on this challenge and get help in the ZK Voting Challenge Telegram Group.
🚀 Checkpoint 0: Environment
Before you begin, you need to install the following tools:
- Node (>= v20.18.3)
- Yarn (v2+)
- Git
- Foundry (If you chose Foundry as solidity framework)
- Nargo (v1.0.0-beta.3)
- bb (v0.82.2)
🚨 Windows Users: Noir (
nargo,bb) isn’t natively supported on Windows. Please install and run Noir inside WSL (Windows Subsystem for Linux) using Ubuntu 24.04.. 🚨
📦 Install nargo and bb
⚡ Use nargo version = 1.0.0-beta.3 for this challenge.
Install with:
curl -L https://raw.githubusercontent.com/noir-lang/noirup/refs/heads/main/install | bash
noirup -v 1.0.0-beta.3
nargo --version
⚡ Use bb version = 0.82.2 (works with this challenge).
Install with:
# Mac (Apple Silicon):
mkdir -p ~/.bb && curl -L https://github.com/AztecProtocol/aztec-packages/releases/download/v0.82.2/barretenberg-arm64-darwin.tar.gz | tar -xzC ~/.bb
# Mac (Intel):
# mkdir -p ~/.bb && curl -L https://github.com/AztecProtocol/aztec-packages/releases/download/v0.82.2/barretenberg-amd64-darwin.tar.gz | tar -xzC ~/.bb
# Linux (x86_64):
# mkdir -p ~/.bb && curl -L https://github.com/AztecProtocol/aztec-packages/releases/download/v0.82.2/barretenberg-amd64-linux.tar.gz | tar -xzC ~/.bb

# Add to PATH (add this to your ~/.zshrc or ~/.bashrc to make it permanent)
export PATH="$HOME/.bb:$PATH"
bb --version
If you are using vscode you may want to install the Noir Language Support extension.
Then download the challenge to your computer and install dependencies by running:
npx create-eth@2.0.20 -e scaffold-eth/se-2-challenges:challenge-zk-voting challenge-zk-voting
cd challenge-zk-voting
When prompted, choose your preferred solidity framework (Hardhat or Foundry)
In the same terminal, start your local network (a blockchain emulator in your computer):
yarn chain
In a second terminal window, 🛰 deploy your contract (locally):
cd challenge-zk-voting
yarn deploy
In a third terminal window, start your 📱 frontend:
cd challenge-zk-voting
yarn start
👩💻 Rerun
yarn deploywhenever you want to deploy contract changes to the frontend. Runyarn deploy --resetfor a completely fresh deploy, even when contracts are unchanged.
⚠️ We've disabled Cursor auto-suggestions (Tab completions and predictions) via .vscode/settings.json to reduce distractions while you code. AI chat and agent features are still enabled, and we've included AGENTS.md and CLAUDE.md files with project context to help AI assistants understand the codebase.
🔒 Want to disable AI and do everything yourself? (Recommended for deeper learning):
- Cursor: add
*to a.cursorignorefile in the root of your project - VSCode: set
chat.disableAIFeaturestotruein.vscode/settings.jsonfile
🤖 AI-Guided Learning Mode (Optional)
Want an interactive tutor that teaches you the concepts while you code? This challenge supports AI-guided learning mode!
- Open this project in an AI coding tool like Claude Code or Cursor
- Run the
/startcommand - The AI tutor will teach you each concept, then give you a coding task
- You write the code, say "check", and the AI runs the tests
- Say "hint" for help, or
/skipif you want the AI to show you the solution - Your progress is saved — use
/startto resume anytime
The AI won't just give you the answers — it teaches first, then has you implement the code yourself. Tests validate your work, and the AI helps you debug if something doesn't pass.
Checkpoint 1: 🗳️🔒 Structure of the Challenge and Voting Contract
💬 What you’ll build
A zk-powered voting flow with three phases:
- Registration: Users submit a commitment that gets added to an incremental Merkle tree (you’ll learn more about this later).
- Proof Generation: Users locally generate a ZK proof based on their secret and the Merkle tree.
- Vote: With the proof, users call the voting function to cast their vote anonymously from a separate address that is not linked to their registered address.
To make this flow possible, we’ll combine:
- Noir → for building ZK circuits and producing a verifier contract
- Solidity → to extend the voting contract and connect it with the verifier
- Next.js/TypeScript → to build the frontend where users generate proofs and cast votes seamlessly
🛠️ Core Features of the Voting Dapp
Our contract will support three main functions:
- Allowlisting ✅ (already implemented)
- Voter Registration (to be built using a Merkle tree)
- Voting (validated with ZK proofs)
👉 Registration is where we’ll start: we need a Merkle tree to prove a user is registered (has a commitment in the tree) and hasn’t voted yet.
👀 Explore the Frontend
📱 Open http://localhost:3000 to spin up your app.
🖥️ Head over to the Voting page and take a look at the frontend you’ll soon bring to life.
🔍 Inspect the Contract
🔍 Next, switch to the Debug Contracts page. For now, you should see just one contract there — Voting.
🔍 Open it up and check out the placeholder functions. Each of them represents a key piece of the voting logic. If you can already explain what they’re supposed to do, you’re ahead of the game! 😎
💡 The Verifier.sol contract is currently just a placeholder and will be replaced with the actual implementation later.
But this time you won’t just be working on the smart contract 🙂
🥅 Goals
- 📝 Review
Voting.solfunctions for an overall understanding
Checkpoint 2: 📋🌲 Register with a Smart Contract Merkle Tree
Time to let users actually register!
Here we’ll implement a register function that:
- Takes a commitment from the caller
- Verifies they’re on the allowlist
- Checks uniqueness
- Inserts the commitment into a lean Incremental Merkle Tree (LeanIMT)
💡 LeanIMT in Short: The tree is pre-filled with zeros. New leaves replace them, merging upward like a binary counter. Index parity (even = left, odd = right) ensures correct order. Only the frontier is stored, making LeanIMT cheap, scalable, and perfect for ZK apps like private voting.
🧠 What’s LeanIMT, and Why Use It?
LeanIMT (Lean Incremental Merkle Tree) is an on-chain data structure that keeps a Merkle root up-to-date cheaply and efficiently.
🧱 Normal Merkle Trees
A standard Merkle tree stores every node. As more leaves are added, recomputing and storing all these hashes becomes very costly in gas and storage.
✂️ LeanIMT’s Optimization
LeanIMT avoids this by:
- Fixing the tree depth from the start (e.g. 16 levels → 65,536 leaves)
- Prepopulating all positions with zero values (hashes of zero)
- Storing only a handful of values called the frontier (at most one active node per level)
New leaves replace zeros, and only the frontier updates. Everything else is assumed to remain zero, so the root can always be recomputed.
🔄 Updating the Tree (Binary Counter Pattern)
Adding leaves works like a binary counter:
- If a slot is empty → put the new leaf there.
- If a slot is full → hash the two values, clear the slot, and carry the result up.
- If the next slot is also full → repeat until an empty slot is found.
💡 This is just like
0111 + 1 = 1000in binary: lower bits reset, and the carry moves up.
⚖️ Index Parity (Order Matters)
Since Hash(left, right) ≠ Hash(right, left), parity decides position:
- Even index leaves (0, 2, 4, …) go on the left
- Odd index leaves (1, 3, 5, …) go on the right, triggering a merge with the left sibling
🌱 Example with 4 Leaves
-
Leaf 0 (even) → slot 0, left child (Frontier: [L0, 0, 0…])
-
Leaf 1 (odd) → slot 0 full →
H01 = Hash(L0, L1)(L0 left, L1 right) → carried to slot 1 (Frontier: [0, H01, 0…]) -
Leaf 2 (even) → slot 0, left child (Frontier: [L2, H01, 0…])
-
Leaf 3 (odd) → slot 0 full →
H23 = Hash(L2, L3)(L2 left, L3 right) → carried to slot 1 Slot 1 full →H0123 = Hash(H01, H23)(H01 left, H23 right) → carried to slot 2 (Frontier: [0, 0, H0123…])
👉 At this point, the frontier has just one value (H0123 at slot 2), but together with zeros it defines the full root.
⚡ Why Use LeanIMT?
- Cheap & predictable: only the frontier updates
- Append-only: leaves can be added but not removed
- ZK-friendly: Poseidon roots work well in zero-knowledge proofs
To understand more about the LeanIMT, take a look at this visual explanation.
Merkle trees aren’t required for ZK proofs, but they’re the most efficient way to prove membership in a large set. In our voting app, they let us cheaply and scalably prove “I’m registered” without showing who you are.
💡 In Checkpoint 3, we’ll dive deeper into what commitments are and how they’re used. For now, think of them as placeholders that users submit during registration.
✅ Registration Rules
When a user registers, we enforce two key checks:
- Address hasn’t registered before
- Commitment is unique (no duplicates)
👉 If either fails → revert. 👉 If another address tries to reuse the same commitment → reject as well.
💡 Don’t forget to implement the necessary state variables.
🌱 Inserting Into the Merkle Tree
Once checks pass:
- Insert the new leaf into the incremental Merkle tree (
LeanIMT) using the commitment as leaf value (library is already imported inVoting.sol). Callinsert()directly on it. - Store the Merkle tree in a state variable:
s_tree. - Emit an event with the leaf index + value:
- Index = leaf’s position when inserted
- Value = the commitment
💡 Explore the LeanIMT library itself to see exactly what happens inside
insert().
🧠 🦉 Guiding Questions
❓ Question 1
What conditions must be true for someone to register? (Hint: allowlist + not registered before)
❓ Question 2
How will you detect and reject a reused commitment, even from another address?
❓ Question 3
Which state variables do you need to track both users and commitments?
❓ Question 4
When emitting NewLeaf, how will you determine the correct index?
(💡 Try tree.size(), but adjust carefully)
After thinking through the guiding questions, have a look at the solution code!
👩🏽🏫 Solution Code
///////////////////////
/// State Variables ///
///////////////////////

/// Checkpoint 2 //////
mapping(address => bool) private s_hasRegistered;
mapping(uint256 => bool) private s_commitments;

LeanIMTData private s_tree;

//////////////////
/// Functions ///
//////////////////

function register(uint256 _commitment) public {
  /// Checkpoint 2 //////
  if (!s_voters[msg.sender] || s_hasRegistered[msg.sender]) {
    revert Voting__NotAllowedToVote();
  }
  if (s_commitments[_commitment]) {
    revert Voting__CommitmentAlreadyAdded(_commitment);
  }
  s_commitments[_commitment] = true;
  s_hasRegistered[msg.sender] = true;
  s_tree.insert(_commitment);
  emit NewLeaf(s_tree.size - 1, _commitment);
}
🔧 Before Testing
Scroll down to the functions getVotingData() and getVoterData(address _voter) in your contract.
👉 Uncomment everything below: /// Checkpoint 2 ///
Then run:
🚀 Tests Passed? You’re Almost There!
Great job! If your tests are passing, you’re just one step away from deployment! 🚀
Before deploying, make one important change:
- Open
00_deploy_your_voting_contract.ts - Set your address as the
ownerAddress - Uncomment deployment of both
poseidon3andleanIMT - Set LeanIMT library address (
leanIMT.address) at line 62
💡 Poseidon3 is the hash function we use. More on that later.
Once that’s done, you’re ready to deploy! 🔗
Run yarn deploy and check out the front-end
🥅 Goals
- Understand how lean incremental Merkle trees work
- Implement the
registerfunction inVoting.sol
Checkpoint 3: ✍️🔒 Write Your First ZK Circuit – Commitment Scheme
Welcome to the Noir world! 🎉
This is where we’ll write our very first ZK circuit, the building block for generating an on-chain verifier.
The goal here: let a user prove they are registered to vote (their commitment is in the Merkle tree) without revealing their address.
👉 You’ll use Noir, a DSL (domain-specific language) for ZK circuits, to generate a Solidity verifier contract — something that would be extremely difficult to implement by hand.
🧠 What Are Zero-Knowledge Circuits?
A circuit is essentially a very complex math equation that represents a program. Noir lets us write a program and compile it into that math equation.
- 👉 Noir lets us write the “program”, compile it into ZK math, and export a Solidity verifier contract.
- Zero-knowledge magic makes it possible to prove and verify we know the solution without revealing the solution itself.
Why is this powerful?
- 🔒 Preserves privacy
- ⚡ Moves heavy computation away from expensive places (Ethereum blockchain) to cheap ones (your CPU/GPU)
💡 ZK proofs let someone prove something is true without revealing any other details about it.
🔑 Step 1: Understand Commitment Schemes
Before we dive into the Merkle root, we need to build the commitment.
Commitment schemes allow someone to “lock in” a value without revealing it, while keeping the option to reveal it later.
In our case:
- We combine a nullifier and a secret (both private).
- Hash them together → this is the commitment stored on-chain as a Merkle leaf when the user registers.
The nullifier plays a special role:
- It lets the Solidity contract track if a proof has already been used.
- If the same nullifier appears again, the vote is rejected (prevents double-voting).
💡 Commitment schemes allow a user to commit to a chosen value (or values) while keeping it hidden, with the ability to reveal the value later.
🔑 Step 2: Set Up Your Noir Project
Head to the folder packages/circuits and open src/main.nr.
This is the entry point of your Noir circuit. Everything we want to prove — and therefore all constraints — must happen inside main.
- Want to create the same structure in another project?
Run
nargo initin a new project. This creates the full folder structure along with amain.nrfile.
Nargo is Noir’s command-line tool. It lets you:
- start new projects
- compile circuits
- run them
- and test directly from the terminal
At the top of the file, you can see that there are already the two Poseidon hash functions imported:
hash_1→ hashes a single valuehash_2→ hashes two values
💡 Poseidon3 is the hash function used to combine left/right child pairs in the LeanIMT binary Merkle tree. It’s chosen over SHA256/Keccak256 because it’s much cheaper and faster inside ZK circuits, while Keccak256 is computationally very expensive to implement in proof systems.
🔑 Step 3: Inputs
The main function already lists three parameters (others are commented for later checkpoints).
🔐 Private vs. Public Inputs
Public inputs (marked with the pub keyword) are visible to the verifier/on-chain and become part of the statement being proven.
Private inputs (also called witnesses) stay hidden. They never leave the prover’s machine. They’re only used locally to build the proof.
The verifier then checks this proof against the public inputs, which guarantees that the hidden private inputs existed and satisfied the circuit’s constraints — all without revealing them.
📖 Learn more about input visibility in the Noir docs.
Public input (revealed to verifier):
nullifier_hash: pub Field→ the public hash of the private nullifier, tracked on-chain to enforce one-time voting
🧠 We hash the nullifier because it isn’t exposed as a public input, otherwise everyone would see it. Using the hashed version adds an extra layer of privacy and ensures there’s no direct link between the nullifier and the commitment.
Private inputs (hidden witness values):
nullifier: Field→ private value used both fornullifier_hashand commitmentsecret: Field→ private value combined withnullifierto form the commitment
💡 The
Fieldtype is Noir’s default number type. It’s likeuintin Solidity, but always restricted to a finite range (a “field”), so math stays consistent inside ZK circuits. See the docs here.
🔑 Step 4: Assert and Re-Hash
Inside the circuit:
- Recompute the
nullifier_hashby hashing the privatenullifier. - Use
assertto check it equals the publicnullifier_hash.
This guarantees:
- The prover really knows the secret nullifier.
- The nullifier itself stays hidden (only the hash is public).
💡
assertensures a condition must hold true for the proof to be valid. It’s the main check we do in circuits.
🔑 Step 5: Build the Commitment
Now, hash the nullifier and secret together — this is the commitment.
Here we use hash_2.
- The commitment is the leaf of the Merkle tree.
- In the next checkpoint, we’ll use it to calculate the Merkle root.
This setup ensures:
- Privacy: the nullifier itself is never public.
- Security: the
nullifier_hashprevents someone from submitting the same proof multiple times (we track them inside our smart contract).
✅ Well done!
🧠 At its core, a circuit is just a set of assertions, enforcing conditions that must always hold true. That’s the heart of it.
You just wrote your first Noir circuit! 🎉
🦉 Guiding Questions
❓ Question 1
How can you re-create the nullifier_hash inside the circuit to check it matches the public input?
❓ Question 2
How will you combine the nullifier and secret to generate the commitment?
After thinking through the guiding questions, have a look at the solution code!
👩🏽🏫 Solution Code
use std::hash::poseidon::bn254::hash_1;
use std::hash::poseidon::bn254::hash_2;

fn main(
    // public inputs
    nullifier_hash: pub Field,
    // private inputs
    nullifier: Field,
    secret: Field,
) {
    /// Checkpoint 3 //////
    let computed_nullifier_hash: Field = hash_1([nullifier]);
    assert(computed_nullifier_hash == nullifier_hash);

    let commitment: Field = hash_2([nullifier, secret]);
}
In here we won’t run any code. That will be done later.
🥅 Goals
- Understand commitment schemes
- Write your first Noir circuit and understand the
assertfunction
Checkpoint 4: 🌳✅ Implement Root Check in ZK Circuit
Time to unlock the core of our circuit — proving that the user really registered and has a commitment in the Merkle tree.
If the root you compute inside the circuit matches the public root on-chain, you’re in and allowed to vote! 🗳️
🔑 What’s New Here?
We extend our circuit to handle Merkle proofs. That means:
- Traverse up the tree using your leaf index and siblings
- Recompute the root inside the circuit
- Compare it against the public
root
If they match → ✅ you’re a valid voter.
🧩 Step 1: Import the Merkle Helper
At the top of your circuit, uncomment the import of binary_merkle_root.
👉 This comes from zk-kit, the Noir counterpart to the Solidity Merkle library used in your contract. It’s the tool we’ll use to recompute the root inside the circuit.
🧩 Step 2: Extend the Inputs
We now need more inputs to make Merkle proofs work.
Public (visible / on-chain):
root: pub Field→ the Merkle root of the tree state at the current moment.- Stored on-chain and used as the reference point.
- The circuit recomputes a root and checks it matches this one.
vote: pub bool→ the chosen option Yes or No (0or1).- It binds the proof to the voter’s choice.
- Even if someone front-runs the proof, the outcome would still be the same, since the vote is baked into the circuit.
depth: pub u32→ the Merkle tree’s depth (number of levels).
Private (hidden witness values):
index: Field→ the leaf’s position in the Merkle tree.- Must stay private, otherwise the proof would reveal which leaf belongs to which voter.
siblings: [Field; 16]→ the array of neighbor hashes needed to climb from the leaf to the root.- Only siblings are included; parent nodes are recomputed inside the circuit.
- Since Noir doesn’t allow dynamic arrays, we use a fixed length of 16.
- This supports up to 2^16 leaves (65,536 voters).
🧠 Arrays in Noir must be fixed length — no dynamic arrays.
🧩 Step 3: Count Siblings
The siblings array is set to length 16, but not all entries are used.
- Count the non-zero entries → this gives you the real path length,
siblings_num. - Add a safety bound: assert that the claimed
depthcan’t exceed the array’s length of 16 (prevents out-of-bounds).
🧩 Step 4: Convert Index → Bits
Convert the leaf’s index into 16 little-endian bits using index.to_le_bits().
This mirrors how the Merkle tree is built from the bottom up. The bit array must align with the fixed siblings: [Field; 16].
- Each bit tells if the node is on the left (0) or right (1) at that level, and controls the hashing order with
siblings[i].
Example:
- Leaf index
5→[1,0,1,0,…]= right, left, right, left.
💡 Sketch the Merkle tree to see how the index bits guide the path.
🧠 Little-endian means writing the binary digits starting with the rightmost bit (the smallest part of the number). For example, 4 in binary is
100, but in little-endian it becomes[0,0,1,…].
🧩 Step 5: Compute the Root
Now compute the Merkle tree root.
Use binary_merkle_root from the imported zk-kit library.
💡 See the function here for expected parameters. When passing the Merkle path depth, use
siblings_num(the number of non-zero sibling hashes). This is safer since it reflects the actual path length rather than the full array size.
🧩 Step 6: Compare Roots
Finally, assert that your computed_root equals the public root input.
If they are the same → ✅ your commitment is valid and included in the tree.
🧩 Step 7: Bind the Vote
Before wrapping up, bind the vote to the proof:
- The
voteinput is declared as a public boolean, so it’s already restricted to0or1. - But if we don’t use it in a constraint, the compiler will warn that it’s unused.
To fix this:
- Cast
voteinto aField. - Enforce the equation
x² = x.
✅ Well done!
🦉 Guiding Questions
❓ Question 1
How can you loop through the siblings array to count only the non-zero entries and store that number as siblings_num?
❓ Question 2
What assert can you add to make sure the given depth never exceeds the maximum length of siblings (16)?
❓ Question 3
How will you turn the leaf’s index into 16 little-endian bits with to_le_bits() so you know left vs. right at each level?
❓ Question 4
Which inputs do you pass into binary_merkle_root to recompute the path up to the root?
(Hint: The first input is the hash function — you want to hash 2 values)
❓ Question 5
How will you compare your computed_root against the public root to finish the membership proof?
❓ Question 6
How do you cast and constrain vote so it becomes part of the circuit and avoids the “unused variable” warning?
After thinking through the guiding questions, have a look at the solution code!
👩🏽🏫 Solution Code
use std::hash::poseidon::bn254::hash_1;
use std::hash::poseidon::bn254::hash_2;
/// Checkpoint 4 //////
use binary_merkle_root::binary_merkle_root;

fn main(
    // public inputs
    nullifier_hash: pub Field,
    // private inputs
    nullifier: Field,
    secret: Field,
    /// Checkpoint 4 //////
    // public inputs
    root: pub Field,
    vote: pub bool,
    depth: pub u32,
    // private inputs
    index: Field,
    // max of 2^16 leaves --> 65536 leaves
    siblings: [Field; 16],
) {
    /// Checkpoint 3 //////
    let computed_nullifier_hash: Field = hash_1([nullifier]);
    assert(computed_nullifier_hash == nullifier_hash);

    let commitment: Field = hash_2([nullifier, secret]);

    /// Checkpoint 4 //////
    let mut siblings_num = 0;
    for i in 0..siblings.len() {
        if siblings[i] != 0 {
            siblings_num += 1;
        }
    }
    assert(depth <= siblings.len());

    let index_bits: [u1; 16] = index.to_le_bits();

    let computed_root = binary_merkle_root(hash_2, commitment, siblings_num, index_bits, siblings);

    assert(computed_root == root);

    // just vote binding, to prevent compiler warnings
    let vote_field = vote as Field;
    assert((vote_field * vote_field) == vote_field);
}
In here we won’t run again any code. We will do that later.
🥅 Goals
- Recreate the Merkle root inside the circuit
- Understand bit manipulation in Noir with little-endian
Checkpoint 5: 📝 Creating the Solidity Verifier Contract
Now that your circuit is set up and running, it’s time to bring it to life on-chain. The end goal of this checkpoint is to generate the Solidity verifier contract, the bridge that lets Ethereum validate your zero-knowledge proofs.
Testing your Circuit inside your Noir folder (optional)
cdinto your circuits folder.- Run
nargo check. This generates a Prover.toml file where you can paste in the arguments you want the circuit to run with. Keep in mind: there can be quite a lot of inputs, and in our case it’s not entirely straightforward, you’ll need to calculate all the necessary hashes upfront before you can pass them in. - Run
nargo execute. This compiles your circuit and executes it locally using the inputs from Prover.toml. If everything works, it produces a witness file. For debugging, you can also log values from inside the circuit by callingstd::println().
💡 A witness is the full set of variable assignments that satisfy your circuit’s constraints. It includes:
- All public inputs
- All private inputs
- All intermediate values computed during execution
The witness file is the actual input the prover consumes in order to construct a proof.
Creating a proof with Barretenberg (bb)
After testing your circuit and producing a witness, the next step is to actually create a zero-knowledge proof.
🔹 What is Barretenberg (bb)?
Barretenberg is the zero-knowledge proving system that Noir is built on.
- Think of Noir (
nargo) as the language and compiler: it takes your high-level program (main.nr) and compiles it into a mathematical object called an ACIR circuit. - Barretenberg (
bb) is the engine: it runs the heavy cryptography to generate and verify proofs from those circuits.
Without bb, your Noir code is just a description of constraints.
With bb, those constraints get turned into cryptographic proofs that others can trust.
🔹 Step 1: Prove with bb prove
bb prove -b <bytecode> -w <witness> -o <output>
Here’s what happens:
-b→ the circuit bytecode incircuits.json-w→ the witness file you created withnargo execute-o→ specifies the file path where the generated proof will be saved
bb takes the circuit + the solution (witness) and runs the UltraHonK proving scheme.
💡 UltraHonK is the default proving scheme used by Barretenberg, a modern, highly optimized successor to PLONK-style systems.
Output: a proof file — a tiny, verifiable object that says:
“I know private inputs that satisfy the circuit’s constraints, given these public inputs.”
Importantly, the proof reveals nothing about your private inputs.
🔹 Step 2: Generate the Verification Key (vk)
Before you (or anyone else) can verify a proof, you need a verification key (vk).
- The vk is a compact summary of the circuit: it encodes the rules and constraints of your program in a form the verifier can understand.
- It is generated once per circuit (from the circuit’s ACIR bytecode) and can then be reused for verifying any number of proofs created for that circuit, as long as the circuit doesn’t change.
To generate it:
bb write_vk -b <bytecode> -o <output>
-b→ the same bytecode fromnargo compile(you'll find it in thecircuits.jsonfile)-o→ the file path where the verification key will be saved
💡 When you run
bb verify, the verifier must know what circuit the proof claims to satisfy. The vk is that reference. Without the vk, the proof file is meaningless — it would be like having a lock but no keyhole to check against.
🔹 Step 3: Verify the Proof
With both the proof file and the vk, anyone can check validity
bb verify -k <vk> -p <proof>
-k→ the verification key-p→ the proof file
✅ Off-chain, this runs instantly. 🔗 On-chain, the vk is embedded into the Solidity verifier contract (see below).
🔹 Step 1: Compile Your Circuit
🚨 For all Noir (
nargoorbb) commands, firstcdinto thepackages/circuitsdirectory.
Make sure all recent changes are applied:
nargo compile
🔹 Step 2: Generate the Verification Key (vk)
Proof generation requires a verification key (vk). It’s the verifier’s compact “rulebook” for your circuit.
You’ll need to generate a new vk any time you make a change to your circuit.
bb write_vk --oracle_hash keccak -b ./target/circuits.json -o ./target/
The vk summarizes your circuit’s constraints (all those asserts you added!) and is reused for verifying all proofs
(see Creating a proof with Barretenberg above for more context).
⚠️ Use
--oracle_hash keccakwhen creating a verification key so the hashing matches Ethereum’s Keccak standard.
🔹 Step 3: Generate the Solidity Verifier Contract
Now let’s build the contract itself:
bb write_solidity_verifier -k ./target/vk -o ./target/Verifier.sol
This creates a Verifier.sol file in packages/circuits/target.
The vk is embedded into this contract, enabling Ethereum to check proofs generated for your circuit.
🔍 Inspecting the Contract
The verifier contract may look overwhelming at first, but here’s what to focus on:
- ✅ Check that values like
NUMBER_OF_PUBLIC_INPUTSmatch what you expect for your proof. - 🚪 The main entry point is the
verifyfunction:
interface IVerifier {
    function verify(bytes calldata _proof, bytes32[] calldata _publicInputs) external view returns (bool);
}
This is the function your application will call to confirm whether a proof is valid.
🚨🚨 Always delete the files in the
targetfolder when you change your circuit or inputs to ensure a clean setup. Whenever the circuit changes, you must also regenerate and replace the verifier smart contract in your Solidity project. 🚨🚨
✅ Verifier Contract Created!
You’ve now successfully generated the Solidity verifier contract. This is the critical piece that connects your off-chain proof generation with on-chain proof verification.
Next, we’ll integrate it into your project and actually put it to work.
🥅 Goals
- Understand how witness, vk, and proof work together
- Create the Solidity verifier contract
Checkpoint 6: 🗳️ Enable Voting – Bring in the Verifier Contract
You’ve built the circuit, created the verifier contract — now it’s time to plug it into our Voting.sol and enable voting! 🗳️
🔹 Step 1: Bring in the Verifier Contract
- Replace the placeholder verifier contract
Verifier.solinpackages/hardhat/contractswith the newly generated contract located inpackages/circuits/target. - Open
00_deploy_your_voting_contract.tsand:- Uncomment the verifier deployment
- Comment out the
verifierAddress - Update the
argsto match your setup
- In
Voting.sol:- At the top, import the verifier contract (just uncomment the existing line)
- In the constructor, initialize the verifier and store it in a variable called
i_verifier
🔹 Step 2: Build the vote Function
Inside the vote function, voters will send their:
- proof → the cryptographic proof (later built in the frontend)
- public inputs →
nullifierHash,root,vote, andtree depth
Before counting votes, we enforce some rules in the following order:
1. Validate the Root 🔐
- Check for empty tree root: this prevents voting when no one has registered yet.
- Validate root matches current root state (
s_tree.root()): This ensures the proof was generated against the actual on-chain Merkle tree, not some arbitrary tree.
Why this matters: Without root validation, an attacker could:
- Create their own fake Merkle tree with commitments they control
- Generate a mathematically valid ZK proof against that fake tree
- Submit the proof with their fake root to the contract
- The verifier would accept it (the proof is valid for that root!)
- Result: They vote without ever registering on-chain, completely bypassing the allowlist system
👉 The root check is what binds the proof to the actual on-chain registration tree. Without it, anyone could vote by creating fake trees. This is your first line of defense!
2. Verify the Proof 🔒
- Call the
verify()function oni_verifierand pass in the proof + public inputs. - The verifier expects public inputs as a
bytes32[]array, in exactly the same order as in your circuit file. - If verification fails → revert the transaction.
3. Prevent Double-Voting 🛑
- Check if the
_nullifierHashhas already been used. - If yes → revert the transaction.
- Track used nullifiers with a mapping:
s_nullifierHashes.
👉 Without this safeguard, anyone could replay the same proof/inputs over and over to vote multiple times. That's why nullifiers are the cornerstone of privacy-preserving voting.
👉 Important: This check happens after proof verification. If the proof is invalid, we want to fail fast without wasting gas on state changes.
✅ Once both checks pass:
- Increment
s_yesVotesors_noVotesaccordingly - Emit the
VoteCastevent
🦉 Guiding Questions
❓ Question 1
What two root validation checks must you perform before any other logic, and why are they essential for security?
❓ Question 2
Before writing the voting logic, how can you stop a _nullifierHash from being reused so no one can vote twice?
Make sure to revert with the correct error.
❓ Question 3
When passing inputs to the verifier, how do you build the bytes32[] array and in what order should you place _nullifierHash, _root, _vote, and _depth?
❓ Question 4
After calling i_verifier.verify(_proof, publicInputs), what condition should you check, and what should happen if it fails?
❓ Question 5
Once the proof is verified, how do you decide whether to increment s_yesVotes or s_noVotes and then emit the VoteCast event?
(Hint: _vote comes as 0 or 1)
After thinking through the guiding questions, have a look at the solution code:
👩🏽🏫 Solution Code
///////////////////////
/// State Variables ///
///////////////////////

/// Checkpoint 6 //////
IVerifier public immutable i_verifier;
mapping(bytes32 => bool) private s_nullifierHashes;

//////////////////
/// Constructor ///
//////////////////

constructor(address _owner, address _verifier, string memory _question) Ownable(_owner) {
    s_question = _question;
    /// Checkpoint 6 //////
    i_verifier = IVerifier(_verifier);
}

//////////////////
/// Functions ///
//////////////////

function vote(bytes memory _proof, bytes32 _nullifierHash, bytes32 _root, bytes32 _vote, bytes32 _depth) public {
        /// Checkpoint 6 //////
        if (_root == bytes32(0)) {
            revert Voting__EmptyTree();
        }

        if (_root != bytes32(s_tree.root())) {
            revert Voting__InvalidRoot();
        }

        bytes32[] memory publicInputs = new bytes32[](4);
        publicInputs[0] = _nullifierHash;
        publicInputs[1] = _root;
        publicInputs[2] = _vote;
        publicInputs[3] = _depth;

        if (!i_verifier.verify(_proof, publicInputs)) {
            revert Voting__InvalidProof();
        }

        if (s_nullifierHashes[_nullifierHash]) {
            revert Voting__NullifierHashAlreadyUsed(_nullifierHash);
        }
        s_nullifierHashes[_nullifierHash] = true;

        if (_vote == bytes32(uint256(1))) {
            s_yesVotes++;
        } else {
            s_noVotes++;
        }

        emit VoteCast(_nullifierHash, msg.sender, _vote == bytes32(uint256(1)), block.timestamp, s_yesVotes, s_noVotes);
    }
Once implemented, run your tests to make sure everything works:
✅ Tests Passed? You're So Close!
If your tests are green, congratulations — you’ve just completed the core Voting.sol contract! 🎉
That means you now have a fully private voting system where:
- ✅ Eligibility is proven via ZK proofs
- ✅ Double-voting is prevented
- ✅ Results are transparently tracked
Run yarn deploy and then we’ll move on to integrating the front-end so users can interact with your voting app.
🥅 Goals
- Understand how nullifiers help with preventing double-voting
- Correctly pass proof and public inputs into the proof verification
Checkpoint 7: 🌱 Create Your Commitment – The First Step to Registration
You’ve got your Voting.sol contract ready, and the verifier is hooked in.
Now it’s time to let real users step into the process and bring the register button to life.
But here’s the deal: before anyone can vote, they need to prove they’re registered.
That starts right here, with creating a commitment.
Think of this as the secret handshake for your voting system:
- Each user makes their own nullifier (to prevent double voting)
- Pairs it with a secret (their private ticket)
- And from these, they compute a commitment (the only thing that goes on-chain)
🚨 Double-check that your circuit and front-end use the same Noir and bb versions. Mismatches will cause errors. In our
nextjs/package.json, you’ll see:"@aztec/bb.js": "0.82.0"and"@noir-lang/noir_js": "1.0.0-beta.3". Make sure these match the versions shown when you runbb --versionandnargo --version.
🛠 Set Up the Commitment Function
📁 Open packages/nextjs/app/voting/_challengeComponents/CreateCommitment.tsx.
The component is already written for you. Your task: implement the generateCommitment function.
Right now, it returns dummy values for commitment, nullifier, and secret.
Those placeholders must go — replace them with real logic!
💡
Fris the finite field type of BN254, ensuring all numbers (like nullifiers and secrets) stay within the valid scalar field used by ZK circuits.
Steps to Implement
- Uncomment the imports at the top.
- Generate fresh values: create a random
nullifierandsecretwithFr.random().- Cast them into
string, then intoBigInt.
- Cast them into
- Hash with Poseidon: compute the
commitmentusing Poseidon (2-input), in the exact order[nullifier, secret].This mirrors the same hashing logic you used in the circuit.
- Format for Solidity: convert your
commitmentinto abytes32hex string.- Hint: use
toHexfrom viem.
- Hint: use
- Return all three values:
commitment,nullifier, andsecret.
🧠 Key Reminder: The commitment is public, but your nullifier and secret are private. They’re the keys to proving your right to vote. We’ll store them in local storage here so you can reuse them later for proof generation. ⚠️ If they leak, someone else could vote on your behalf!
🦉 Guiding Questions
❓ Question 1
How can you use Fr.random() to generate values that stay inside the BN254 field,
and why do you need to cast them to BigInt before further use?
❓ Question 2
What happens if you swap the input order in Poseidon
(e.g., [secret, nullifier] instead of [nullifier, secret])?
❓ Question 3
How will you ensure that your commitment, nullifier, and secret
are all formatted as valid bytes32 hex strings that Solidity will accept?
After thinking through the guiding questions, have a look at the solution code:
👩🏽🏫 Solution Code
const generateCommitment = async (): Promise<CommitmentData> => {
  /// Checkpoint 7 //////
  const nullifier = BigInt(Fr.random().toString());
  const secret = BigInt(Fr.random().toString());
  const commitment = poseidon2([nullifier, secret]);

  const commitmentHex = toHex(commitment, { size: 32 });
  const nullifierHex = toHex(nullifier, { size: 32 });
  const secretHex = toHex(secret, { size: 32 });

  return {
    commitment: commitmentHex,
    nullifier: nullifierHex,
    secret: secretHex,
  };
};
✅ Implemented?! Great job!
Head over to localhost:3000 and add yourself to the allowlist. Then go ahead and register.
If everything went smoothly, you should now see:

🎉 Now your secret and nullifier are hidden in the smart contract's Merkle root. Only you know them — or better, your browser does 🙂 (they’re stored in local storage)!
🚨 Each time you restart your local chain with
yarn chain, scroll down to the bottom of the Voting page and hit Clear Local Storage. Otherwise, since the contracts reuse the same addresses, the front-end will mistakenly think you’ve already created a commitment for that contract.
💡 You can inspect the commitment saved in localStorage. Just scroll to the bottom of the page and click Log Local Storage.

🥅 Goals
- Learn how to format values into the correct types expected by the verifier contract
- Understand how to perform hashing with Poseidon in TypeScript
Checkpoint 8: 🔏 Generate Your Proof
You’ve created your commitment and registered successfully.
Now comes the magic moment: creating the proof that you’re in the Merkle tree.
This step is all about producing a zero-knowledge proof that says:
“I’m registered, I know my nullifier + secret, and therefore I can show my membership in the tree.”
🛠 Set Up the Proof Generation Function
📁 Open packages/nextjs/app/voting/_challengeComponents/GenerateProof.tsx.
💡 In this step we create two proofs:
- Merkle inclusion proof (to gather the siblings we need),
- ZK proof that gets sent to the Solidity verifier.
The Merkle proof is like a little trick, it supplies the path, and the ZK proof wraps this together with nullifier, secret, and vote.
🎯 Your goal: finish the generateProof function. The rest is already in place.
-
Uncomment imports
-
Remove the
void+ return statement and start implementing -
Compute the
nullifierHash(Hint:poseidon1) -
Rebuild the Merkle tree
- Initialize a new tree with Poseidon2 hashing (Hint:
new LeanIMT) - Extract values from events →
_leavesis an array of contract events. Each event holds avalue(the on-chain commitment). Themappulls out just those values into a clean arrayleaves. - Reverse the order → Events are emitted newest-last, but our Merkle tree builds from oldest-first. Reversing ensures the tree is reconstructed correctly.
- Insert into
LeanIMTto reconstruct the exact tree state (Hint:.insertMany())💡 We imported the same
zk-kit/lean-imtlibrary, but this time for TypeScript.
- Initialize a new tree with Poseidon2 hashing (Hint:
-
Create Merkle tree inclusion proof
- Call
.generateProof(_index)on thecalculatedTree. - From the result, access
.siblingsand turn it into an array. - Add
"0"placeholders so the siblings array always has the fixed length expected by the circuit (16).
- Call
-
Prepare circuit inputs (
input)- Ensure all values are in the same order as in your circuit.
- Convert everything into strings (siblings should be a string array).
-
Create the witness
- Initialize Noir circuit instance:
const noir = new Noir(_circuitData);. This loads your compiled ZK circuit into JavaScript so you can run it. - Run:
const witness = await noir.execute(input);. This returns the witness. - Use
console.logif you want to inspect how it looks.
- Initialize Noir circuit instance:
-
Generate the ZK proof
-
Initialize the proving backend:
const honk = new UltraHonkBackend(_circuitData.bytecode, { threads: 1 }); -
Generate the proof:
honk.generateProof(witness, {keccak: true});. This takes the witness from Noir and produces the actual ZK proof plus its public inputs, using Keccak hashing for consistency with the verifier. -
For debugging, you can
console.logyour proof (make sure the silence logs around the .generateProof, temporarily override)
💡 The UltraHonk backend is the proving engine that takes your circuit’s bytecode + witness to generate the zero-knowledge proof. It produces the same format your Solidity verifier expects. The
threadsoption controls how many CPU cores are used (1is enough, more threads = faster). -
-
Format the result for Solidity
- Encode
[proof, publicInputs]withencodeAbiParametersfrom viem. Make sure each value is in hex format. - (Hint: check your
Voting.solcontract for the expected format.)
- Encode
🦉 Guiding Questions
❓ Question 1
How will you compute nullifierHash with poseidon1,
and what input format must _nullifier be in?
(Hint: BigInt)
❓ Question 2
Events are emitted newest-last on chain.
How will you transform _leaves so the IMT receives them oldest-first?
❓ Question 3
How do you make sure your siblings array has a length of 16?
❓ Question 4
In what exact order and types does your circuit declare inputs?
After thinking through the guiding questions, have a look at the solution code:
👩🏽🏫 Solution Code
const generateProof = async (
  _root: bigint,
  _vote: boolean,
  _depth: number,
  _nullifier: string,
  _secret: string,
  _index: number,
  _leaves: any[],
  _circuitData: any,
) => {
  /// Checkpoint 8 //////
  const nullifierHash = poseidon1([BigInt(_nullifier)]);
  const calculatedTree = new LeanIMT((a: bigint, b: bigint) =>
    poseidon2([a, b]),
  );
  const leaves = _leaves.map((event) => {
    return event?.args.value;
  });
  const leavesReversed = leaves.reverse();
  calculatedTree.insertMany(leavesReversed as bigint[]);
  const calculatedProof = calculatedTree.generateProof(_index);
  const sibs = calculatedProof.siblings.map((sib) => {
    return sib.toString();
  });

  const lengthDiff = 16 - sibs.length;
  for (let i = 0; i < lengthDiff; i++) {
    sibs.push("0");
  }
  const input = {
    nullifier_hash: nullifierHash.toString(),
    nullifier: BigInt(_nullifier).toString(),
    secret: BigInt(_secret).toString(),
    root: _root.toString(),
    vote: _vote,
    depth: _depth.toString(),
    index: _index.toString(),
    siblings: sibs,
  };
  try {
    const noir = new Noir(_circuitData);
    const { witness } = await noir.execute(input);
    console.log("witness", witness);
    const honk = new UltraHonkBackend(_circuitData.bytecode, { threads: 1 });
    const originalLog = console.log;
    console.log = () => {};
    const { proof, publicInputs } = await honk.generateProof(witness, {
      keccak: true,
    });
    console.log = originalLog;
    console.log("proof", proof);
    const proofHex = toHex(proof);
    const inputsHex = publicInputs.map((x) =>
      typeof x === "string"
        ? (x as `0x${string}`)
        : toHex(x as Uint8Array, { size: 32 }),
    );
    const result = encodeAbiParameters(
      [{ type: "bytes" }, { type: "bytes32[]" }],
      [proofHex, inputsHex],
    );
    console.log("result", result);
    return { proof, publicInputs };
  } catch (error) {
    console.log(error);
    throw error;
  }
};
✅ Implemented?! Well done!
Fire up localhost:3000, pick your voting option, and hit Generate Proof.
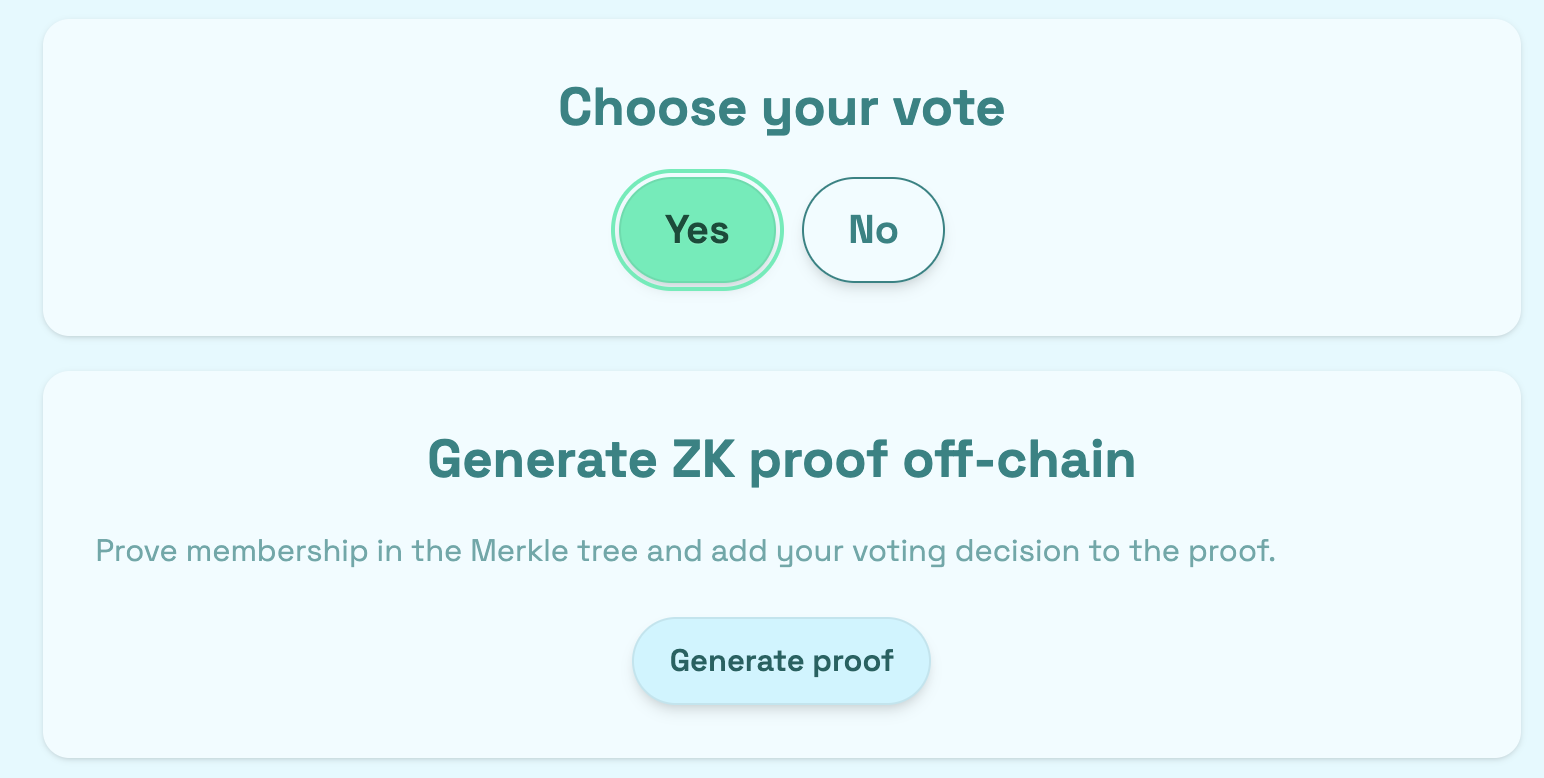
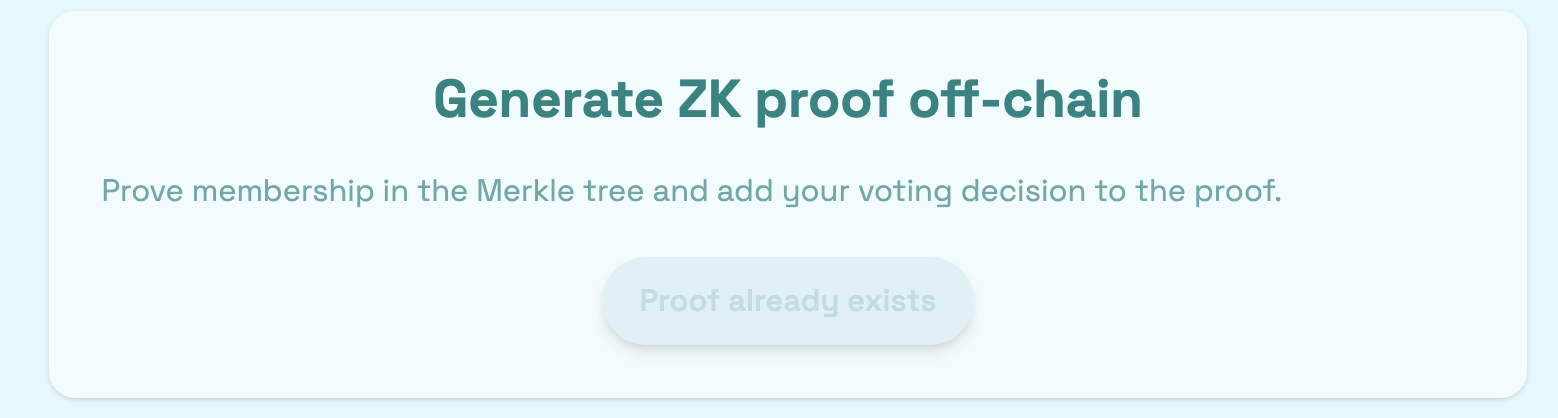
Once the proof is created, the button will update to show Proof already exists.
👉 If you added a console.log, check your dev console to see the raw proof output.
👉 Alternatively, scroll to the bottom of the page and click Log Local Storage to print out the proof data saved in your browser.
🥅 Goals
- Rebuild the Merkle tree and generate the siblings proof
- Format inputs correctly for the circuit
- Generate a valid ZK proof with Noir + UltraHonk
Checkpoint 9: 🔥 Create a Burner Wallet on Hardhat to Send Your Vote
You’ve got your ZK proof ready — now it’s time to actually cast your vote.
But ⚠️ here’s the catch: if you use the same address you registered with, everyone can see on-chain which address voted and how they voted. That would undo all the effort we just put into Noir, Merkle trees, and proof generation.
So instead, we’ll send the vote from a fresh burner wallet, an address that has no link to your registration wallet or any past transactions. That way, only the proof ties you to your vote, nothing else.
🧠💡 The key idea: break the link between registration address and voting address. The proof is the only bridge, and only you know it, preserving your privacy.
🛠 Set Up the Burner Wallet Voting
📁 Open packages/nextjs/app/voting/_components/VoteWithBurnerHardhat.tsx
💡 Remove the placeholders and implement the logic below.
You’ll be working in two functions:
generateBurnerWalletsendVoteWithBurner
1. Generate a fresh burner wallet
- In
generateBurnerWallet, create a brand-new wallet. - Use viem to generate this new keypair.
2. Fund the burner (local Hardhat only)
- Inside
sendVoteWithBurner, fund your wallet within the local Hardhat environment. - Send ETH from the first signer account so the burner has enough gas to vote.
3. Call the vote function
- With the burner funded, call the
votefunction on your Voting.sol contract. - Pass in both the proof and the public inputs.
- Retrieve them directly from
proofDatain localStorage. - Format the proof correctly (Hint:
uint8[], you can use the helper functionuint8ArrayToHexString). - Ensure the public inputs are passed in the exact order the circuit expects.
🦉 Guiding Questions
❓ Question 1
How do you generate a fresh wallet using viem?
❓ Question 2
How can you fund the generated wallet with viem?
❓ Question 3
Where in localStorage can you find proofData, and how do you access it in your code?
❓ Question 4
How do you ensure the public inputs are passed in the exact order the circuit expects? (Hint: not much to do 🙂)
After thinking through the guiding questions, have a look at the solution code:
👩🏽🏫 Solution Code
const sendVoteWithBurner = async ({
  viemContract,
  publicClient,
  walletAddress,
  proofData,
}: {
  viemContract: any;
  publicClient: ReturnType<typeof createPublicClient>;
  walletAddress: `0x${string}`;
  proofData: LocalProofData;
}): Promise<string> => {
  /// Checkpoint 9 //////
  const needed = parseEther("0.01");
  const bal = await publicClient.getBalance({ address: walletAddress });
  if (bal < needed) {
    const testClient = createTestClient({
      chain: hardhat,
      mode: "hardhat",
      transport: http("http://localhost:8545"),
    });
    await testClient.setBalance({ address: walletAddress, value: needed });
  }

  const hash = await viemContract.write.vote([
    uint8ArrayToHexString(proofData.proof),
    proofData.publicInputs[0],
    proofData.publicInputs[1],
    proofData.publicInputs[2],
    proofData.publicInputs[3],
  ]);
  const receipt = await publicClient.waitForTransactionReceipt({ hash });
  return receipt.transactionHash;
};

const generateBurnerWallet = () => {
  /// Checkpoint 9 //////
  const privateKey = generatePrivateKey();
  const account = privateKeyToAccount(privateKey);
  const wallet = {
    privateKey: privateKey as `0x${string}`,
    address: account.address as `0x${string}`,
  };
  setBurnerWallet(wallet);

  const effectiveContractAddress = contractAddress || contractInfo?.address;
  if (effectiveContractAddress && userAddress) {
    saveBurnerWalletToLocalStorage(
      wallet.privateKey,
      wallet.address,
      effectiveContractAddress,
      userAddress,
    );
  }

  return wallet;
};
🎉 Implemented?! Let’s Vote!
Let’s click Vote and send your vote out. Your voting decision was already defined when you created the proof — it’s bound to that proof, so no one can front-run or alter it.
Click Vote and cast your ballot.
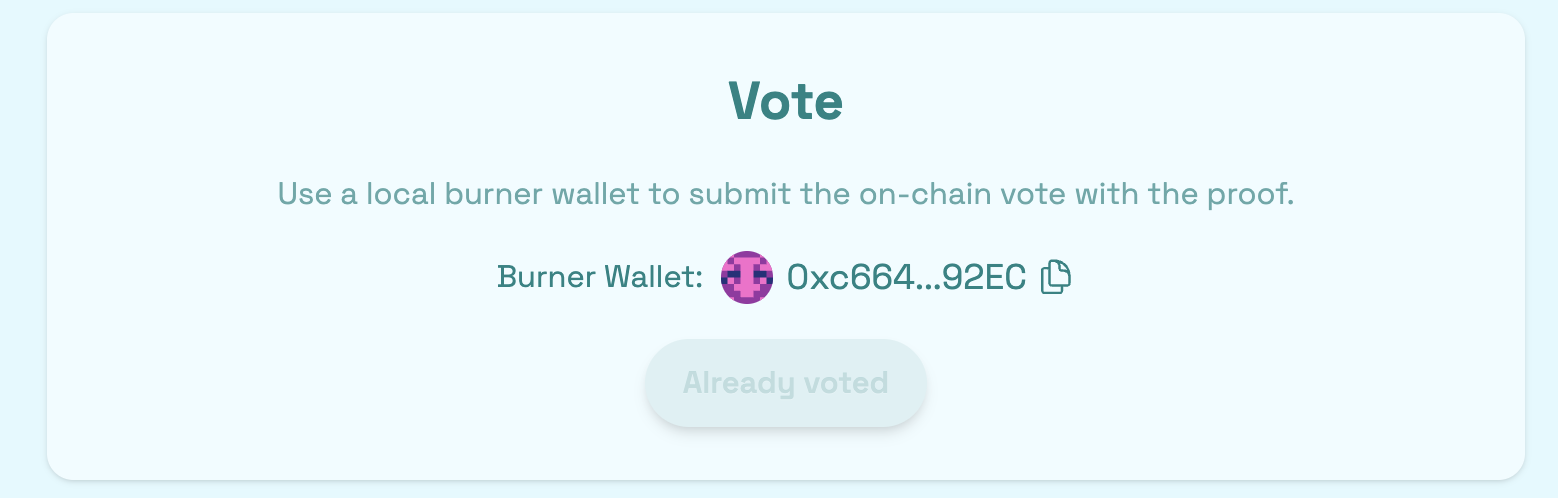
If everything went well, you should now see your vote counted (in this example: Yes = 1).
🎊 Congrats, you’ve just cast a private vote!
🥅 Goals
- Create and fund a burner wallet with viem
- Use it to submit your vote with proof + public inputs
- Understand why a burner wallet is needed
Checkpoint 10: 🌍 Prepare to Vote on a Real Network
You proved inclusion and voted locally. Now let’s make it real: Send the same privacy-preserving vote on the Sepolia testnet.
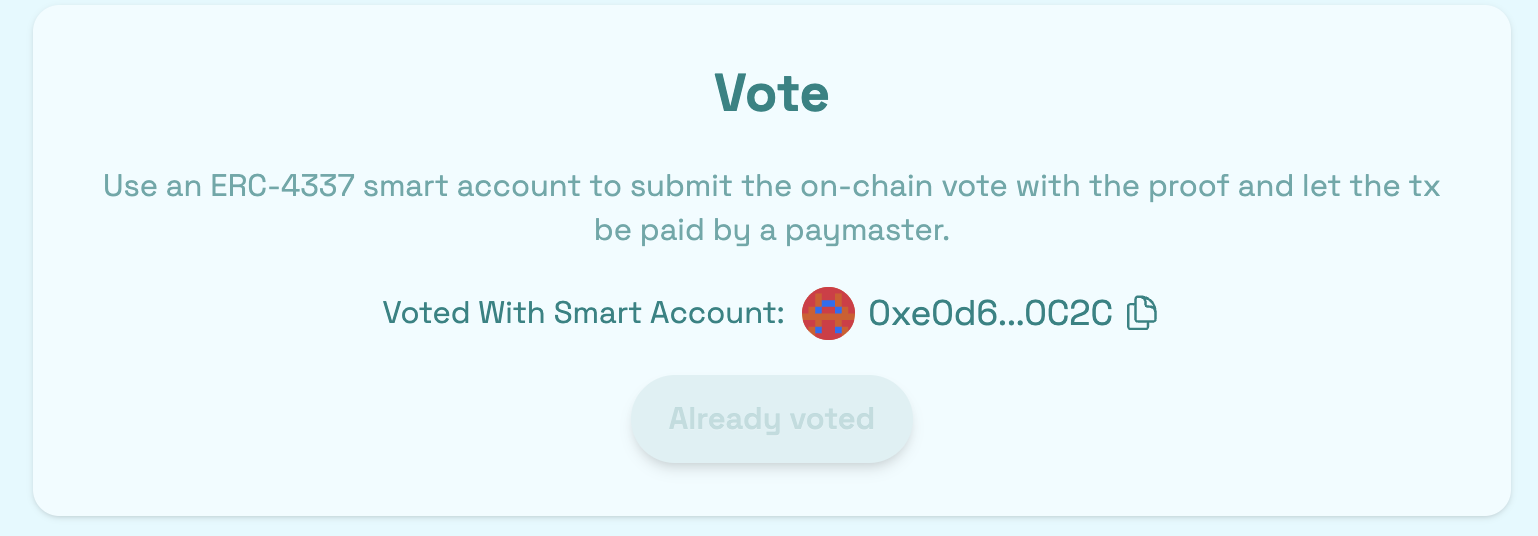
Here it gets a bit trickier to fund the account with a neutral address that isn’t linked to you. That’s why we use ERC-4337 (Account Abstraction) with a verifying paymaster to cover gas costs.
💡 To keep things simple, we’re using Pimlico, a third-party ERC-4337 provider. It handles your UserOperations through a bundler and covers gas with a paymaster. Setup in TypeScript is straightforward.
🚨 First, sign up at Pimlico, grab your API key, and drop it into your .env file. On Sepolia, you can use it for free.
You’ll be working in two functions:
createSmartAccountvoteOnSepolia
📁 Open packages/nextjs/app/voting/_components/VoteWithBurnerSepolia.tsx
🛠 Create the Smart Account Wallet
-
Generate a new private key and wallet (fresh, never used).
-
Set up a public client connected to Sepolia.
-
Use
toSafeSmartAccountfrom the permissionless library to create your smart account.
const account = await toSafeSmartAccount({
  client: publicClient,
  owners: [wallet],
  version: "1.4.1",
});
- Build a smartAccountClient with createSmartAccountClient, this is what you’ll use later to send your vote.
const smartAccountClient = createSmartAccountClient({
  account,
  chain: CHAIN_USED,
  bundlerTransport: http(pimlicoUrl),
  paymaster: pimlicoClient,
  userOperation: {
    estimateFeesPerGas: async () => {
      return (await pimlicoClient.getUserOperationGasPrice()).fast;
    },
  },
});
- Finally return
smartAccountClient,smartAccount,walletOwner
🛠 Cast the Vote
-
Before sending the transaction to the bundler, first build the calldata using viem’s
encodeFunctionData(with the same args as in the previous checkpoint). -
Next, use your smartAccountClient to send the transaction with
.sendTransactionand capture the resulting UserOpHash. -
Finally, return this hash.
🦉 Guiding Questions
Question 1
How do you generate a brand-new private key and wallet in your setup so it’s never linked to your registration address?
Question 2
What role does the Safe smart account (via toSafeSmartAccount) play compared to a normal EOA?
Question 3
Why do we need a bundler and a paymaster when sending the transaction on Sepolia, instead of just sending it directly?
Question 4
Once you send the transaction, where can you look up the UserOpHash to confirm that your vote was included on-chain?
After thinking through the guiding questions, have a look at the solution code!
👩🏽🏫 Solution Code
const createSmartAccount = async (): Promise<{
  smartAccountClient: any;
  smartAccount: `0x${string}`;
  walletOwner: `0x${string}`;
}> => {
  try {
    /// Checkpoint 10 //////
    const privateKey = generatePrivateKey();
    const wallet = privateKeyToAccount(privateKey);
    const publicClient = createPublicClient({
      chain: CHAIN_USED,
      transport: http(RPC_URL),
    });
    const account = await toSafeSmartAccount({
      client: publicClient,
      owners: [wallet],
      version: "1.4.1",
    });
    const smartAccountClient = createSmartAccountClient({
      account,
      chain: CHAIN_USED,
      bundlerTransport: http(pimlicoUrl),
      paymaster: pimlicoClient,
      userOperation: {
        estimateFeesPerGas: async () => {
          return (await pimlicoClient.getUserOperationGasPrice()).fast;
        },
      },
    });
    return {
      smartAccountClient,
      smartAccount: account.address as `0x${string}`,
      walletOwner: wallet.address as `0x${string}`,
    };
  } catch (error) {
    console.error("Error creating smart account:", error);
    throw error;
  }
};

const voteOnSepolia = async ({
  proofData,
  contractInfo,
  contractAddress,
  smartAccountClient,
}: {
  proofData: any;
  contractInfo: any;
  contractAddress: any;
  smartAccountClient: any;
}): Promise<{ userOpHash: `0x${string}` }> => {
  if (!contractInfo && !contractAddress) throw new Error("Contract not found");
  /// Checkpoint 10 //////
  const callData = encodeFunctionData({
    abi: (contractInfo?.abi as any) || ([] as any),
    functionName: "vote",
    args: [
      toHex(proofData.proof),
      proofData.publicInputs[0], // _nullifierHash
      proofData.publicInputs[1], // _root
      proofData.publicInputs[2], // _vote
      proofData.publicInputs[3], // _depth
    ],
  });

  const userOpHash = await smartAccountClient.sendTransaction({
    to: (contractAddress || contractInfo?.address) as `0x${string}`,
    data: callData,
    value: 0n,
  });

  return { userOpHash };
};
🚀 Checkpoint Accomplished!
Great work! Now head to the next checkpoint where we’ll deploy everything to Sepolia and finally cast your vote on-chain for real.
🥅 Goals
- Learn how to set up a smart account with ERC-4337 (via Pimlico)
- Use a bundler + paymaster (via Pimlico) to send a sponsored transaction
Checkpoint 11: 💾 Deploy your contracts and vote on Sepolia! 🛰
Configuration of Third-Party Services for Production-Grade Apps
By default, 🏗 Scaffold-ETH 2 provides predefined API keys for popular services such as Alchemy and Etherscan. This makes it easy to start building and complete your Speedrun Ethereum without additional setup.
For production-grade apps, you should generate your own API keys to avoid hitting rate limits and and to ensure integrations like Pimlico work properly.
Configure your keys here:
- 🔷
ALCHEMY_API_KEYinpackages/hardhat/.envandpackages/nextjs/.env.local→ Get key from Alchemy - 🔑
NEXT_PUBLIC_PIMLICO_API_KEYinpackages/nextjs/.env.local→ Get key from Pimlico - 📃
ETHERSCAN_API_KEYinpackages/hardhat/.env→ Get key from Etherscan
💬 Hint: Store environment variables for Next.js in Vercel/system env config for live apps, and use
.env.localfor local testing.
Deploying Your Smart Contracts
🔐 You will need to generate a deployer address using yarn generate. This creates a mnemonic and saves it locally.
👩🚀 Use yarn account to view your deployer account balances.
⛽️ You will need to send ETH to your deployer address with your wallet, or obtain it from a public faucet of your chosen network.
🚨 Don't forget to set the owner address inside the
00_deploy_your_voting_contract.ts.
🚀 Run yarn deploy --network sepolia to deploy your smart contract to Sepolia.
💬 Hint: You can set the defaultNetwork in hardhat.config.ts to sepolia OR you can yarn deploy --network sepolia.
💻 Inside scaffold.config.ts change the targetNetwork to chains.sepolia. View your front-end at http://localhost:3000 and verify you see the correct network Sepolia.
Deploying Your Frontend to Vercel
⚠️ Vercel/static deploys: copy the circuit bytecode into the Next.js public folder so the frontend can fetch it at runtime.
Run this before deploying:
cp packages/circuits/target/circuits.json packages/nextjs/public/circuits.json
📦 Run yarn vercel to package up your front-end and deploy.
You might need to log in to Vercel first by running:
yarn vercel:login. Once you log in (via email, GitHub, etc.), the default options should work. If you want to redeploy to the same production URL:yarn vercel --prod. If you omit the--prodflag it will deploy to a preview/test URL. Follow the steps to deploy to Vercel — you’ll get a public URL.
🚀 🔥 Challenge Conquered!
Now vote! Register yourself, create the proof, and hit the Vote button.
🎉 Congrats! You’ve just pulled it off — an entire privacy-preserving voting app running fully on-chain.
Take a moment to celebrate, this is big! 🥳 Give yourself a pat on the back (or two 👏👏).
Checkpoint 12: 📜 Contract Verification
Run the yarn verify --network your_network command to verify your contracts on etherscan 🛰
👉 Search this address on Sepolia Etherscan to get the URL you submit to 🏃♀️SpeedRunEthereum.com.
Checkpoint 13: 🧠🍔 Final Considerations & Food for Thought
You now have a working ZK voting dApp, a big milestone! 🚀
This last checkpoint isn’t about more code, but about thinking like a builder shipping to production.
⚠️ Root history matters
- Using only the latest root works for demos, but in production it causes stale proof failures: a user generates a proof → another registers → the root changes → their vote reverts.
- Fix: keep a ring buffer of recent roots (e.g., last 30–100). New roots overwrite the oldest.
- When verifying, accept proofs against any root in history.
- Benefit: fewer failed txs, smoother UX, resilience against congestion.
- Trade-off: slightly higher storage/gas costs, but worth it for reliability.
🔐 Privacy depends on people
- In ZK systems, your privacy comes from the anonymity set → the group of all participants you could plausibly be.
- With only 1–2 voters, it’s trivial to guess who voted what. True privacy emerges only as more commitments join the set.
- Larger set = stronger privacy. Observers can’t tell which registered user cast a given vote.
- Good UX: show current anonymity set size (e.g., “12 registered voters”) so participants understand their privacy.
- Some apps even enforce a minimum set size before voting begins.
🗳 Registration strategy
- In production, define a clear registration period before voting starts.
- If users can register + vote immediately, observers may correlate actions, especially with low participation.
- A dedicated registration window lets commitments accumulate → stronger anonymity set.
- Once registration ends, voting opens → privacy improves since votes can’t be tied to registration timing.
🛠 Indexing is key
- For demos, rebuilding the Merkle tree in-browser works, but it’s slow/unreliable.
- In production, run a dedicated indexer:
- Listen to contract events
- Rebuild the tree off-chain
- Store roots + siblings
- Benefits:
- No heavy browser computations
- Correct data even during reorgs
- Faster, smoother UX + single trusted source of truth
⛽️ Gas sponsorship
- In this challenge, Pimlico made gasless voting easy.
- In production, consider running your own verifying paymaster:
- Define rules → per-poll budgets, rate limits, or policies
- Avoid reliance on third parties
- Full visibility into costs
- Result: customizable, reliable, decentralized gas sponsorship.
⚠️ Limitations, not MACI
This challenge does not implement the full MACI (Minimal Anti-Collusion Infrastructure) framework. While it showcases commitment + nullifier–based privacy, it does not provide coercion resistance.
In this version, a voter’s choice is baked into the calldata, and by revealing their proof, they can prove how they voted afterwards.
That means vote selling or coercion is still possible.
True coercion resistance (as provided by MACI) requires an extra mechanism, typically a key-change step or coordinator, so that voters can’t prove their actual choice even if they try.
If you want to go deeper into why this matters, and how systems like MACI and multi-party computation solve it, read Vitalik Buterin’s essay.
If you want to see a real-world project that implements MACI, check out maci.pse.dev.
🌱 Beyond voting
You now understand the core mechanics of ZK voting:
✔ Commitments & nullifiers ✔ Merkle proofs & trees ✔ Noir circuits & constraints ✔ Solidity verifiers ✔ Anonymous vote casting
But this is just the beginning. The same commitment + nullifier pattern that powers your voting system also unlocks a world of other privacy-preserving applications:
- Mixers (unlink deposits and withdrawals)
- Shielded ERC-20 transfers
- Quadratic voting
- New governance models
This challenge is your entry point into a new design space. 💥
What will you build with Noir and ZK circuits? 🧪✨